
Hooray for April!
We are lucky enough to live in a place where April does not just mean ‘April showers’ but we head right into the ‘May flowers’ part of springtime! The sunny skies, warm weather and beautiful scenery get me so excited to get back outdoors and explore. It does make it hard for me to find the same kind of time for designing and crocheting though, because I just want to soak up all of the beautiful days!
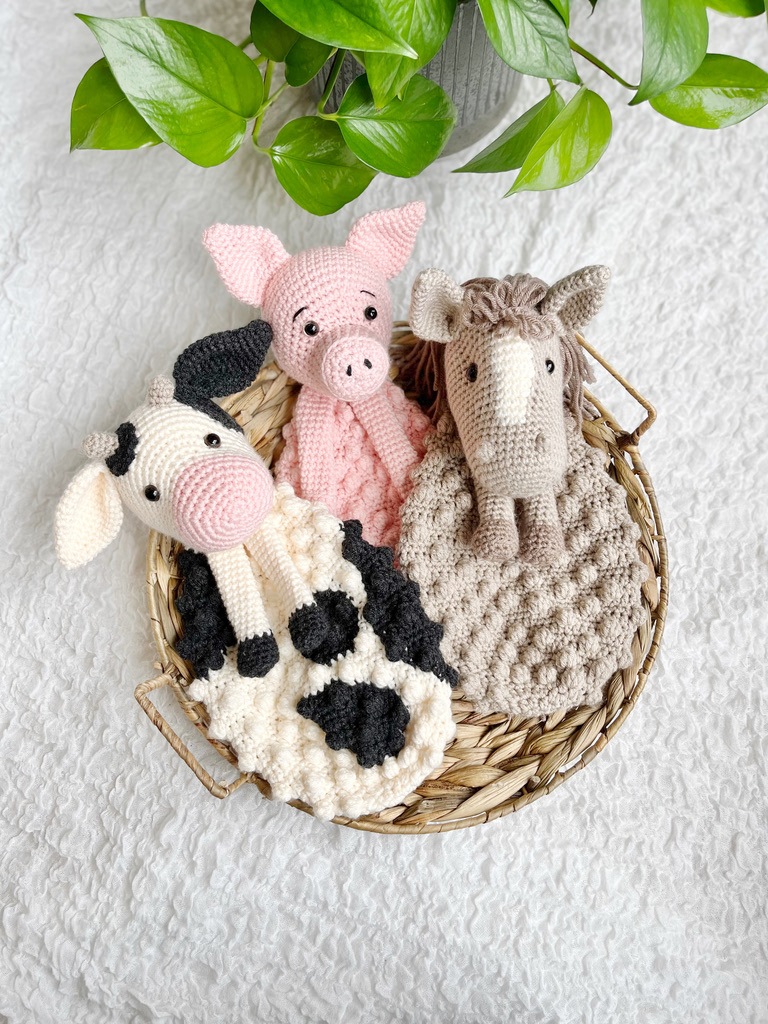
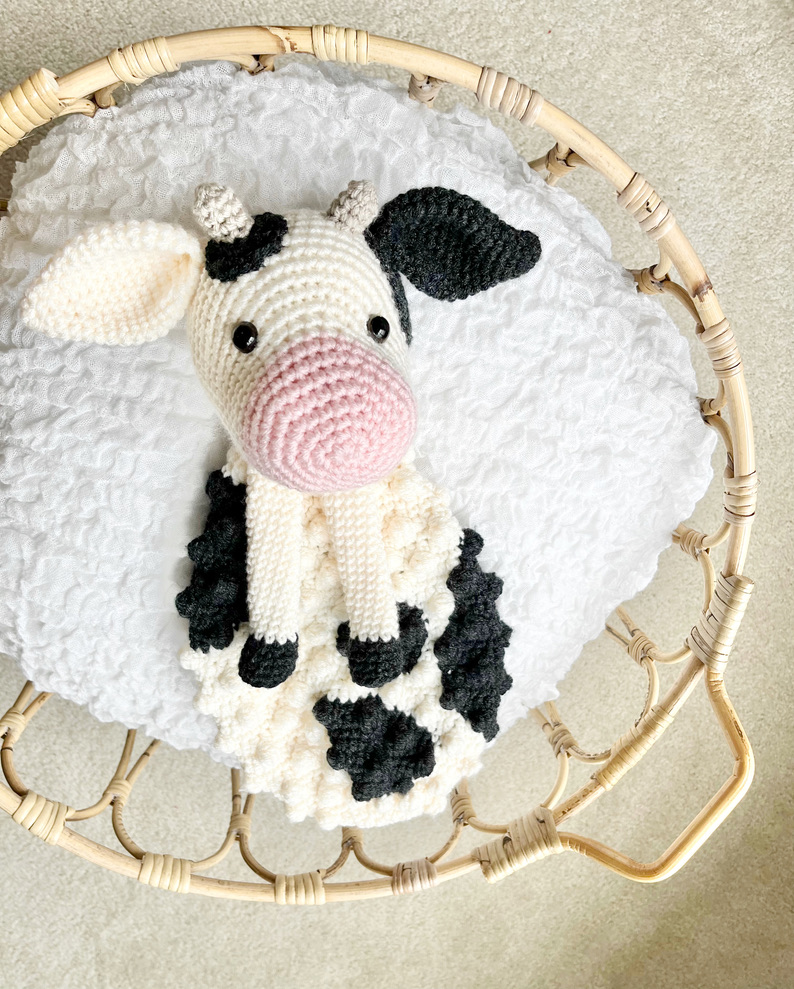
Thankfully, I was able to get this month’s free pattern done with plenty of time to share 🙂 If you’ve followed me on Instagram or Facebook then I’m sure you’ve seen the most recent bobble buddy release – the Farm Collection!! This collection has been one of my very favorites so far. I really challenged myself in the design department with the different shapes of these buddies, the stitches used and the color changes involved. I’m so proud of how they turned out! If you’ve tried out any of the patterns, I sure hope you love them too and I’d love for you to share your work with me. If you haven’t tried them out yet, you can find the buddies on Etsy and Ravelry!
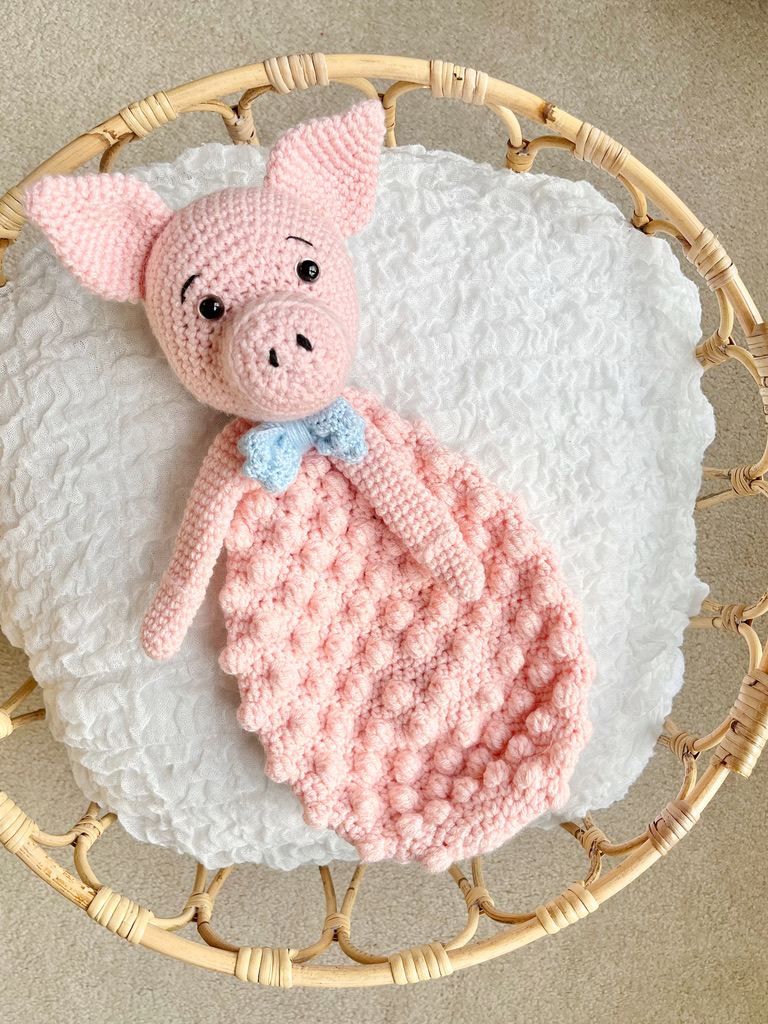
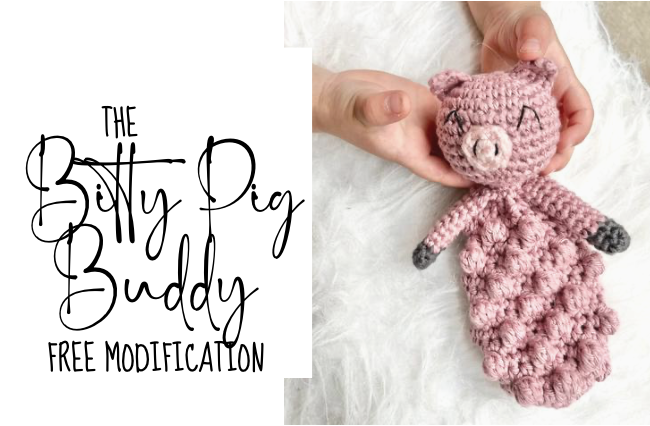
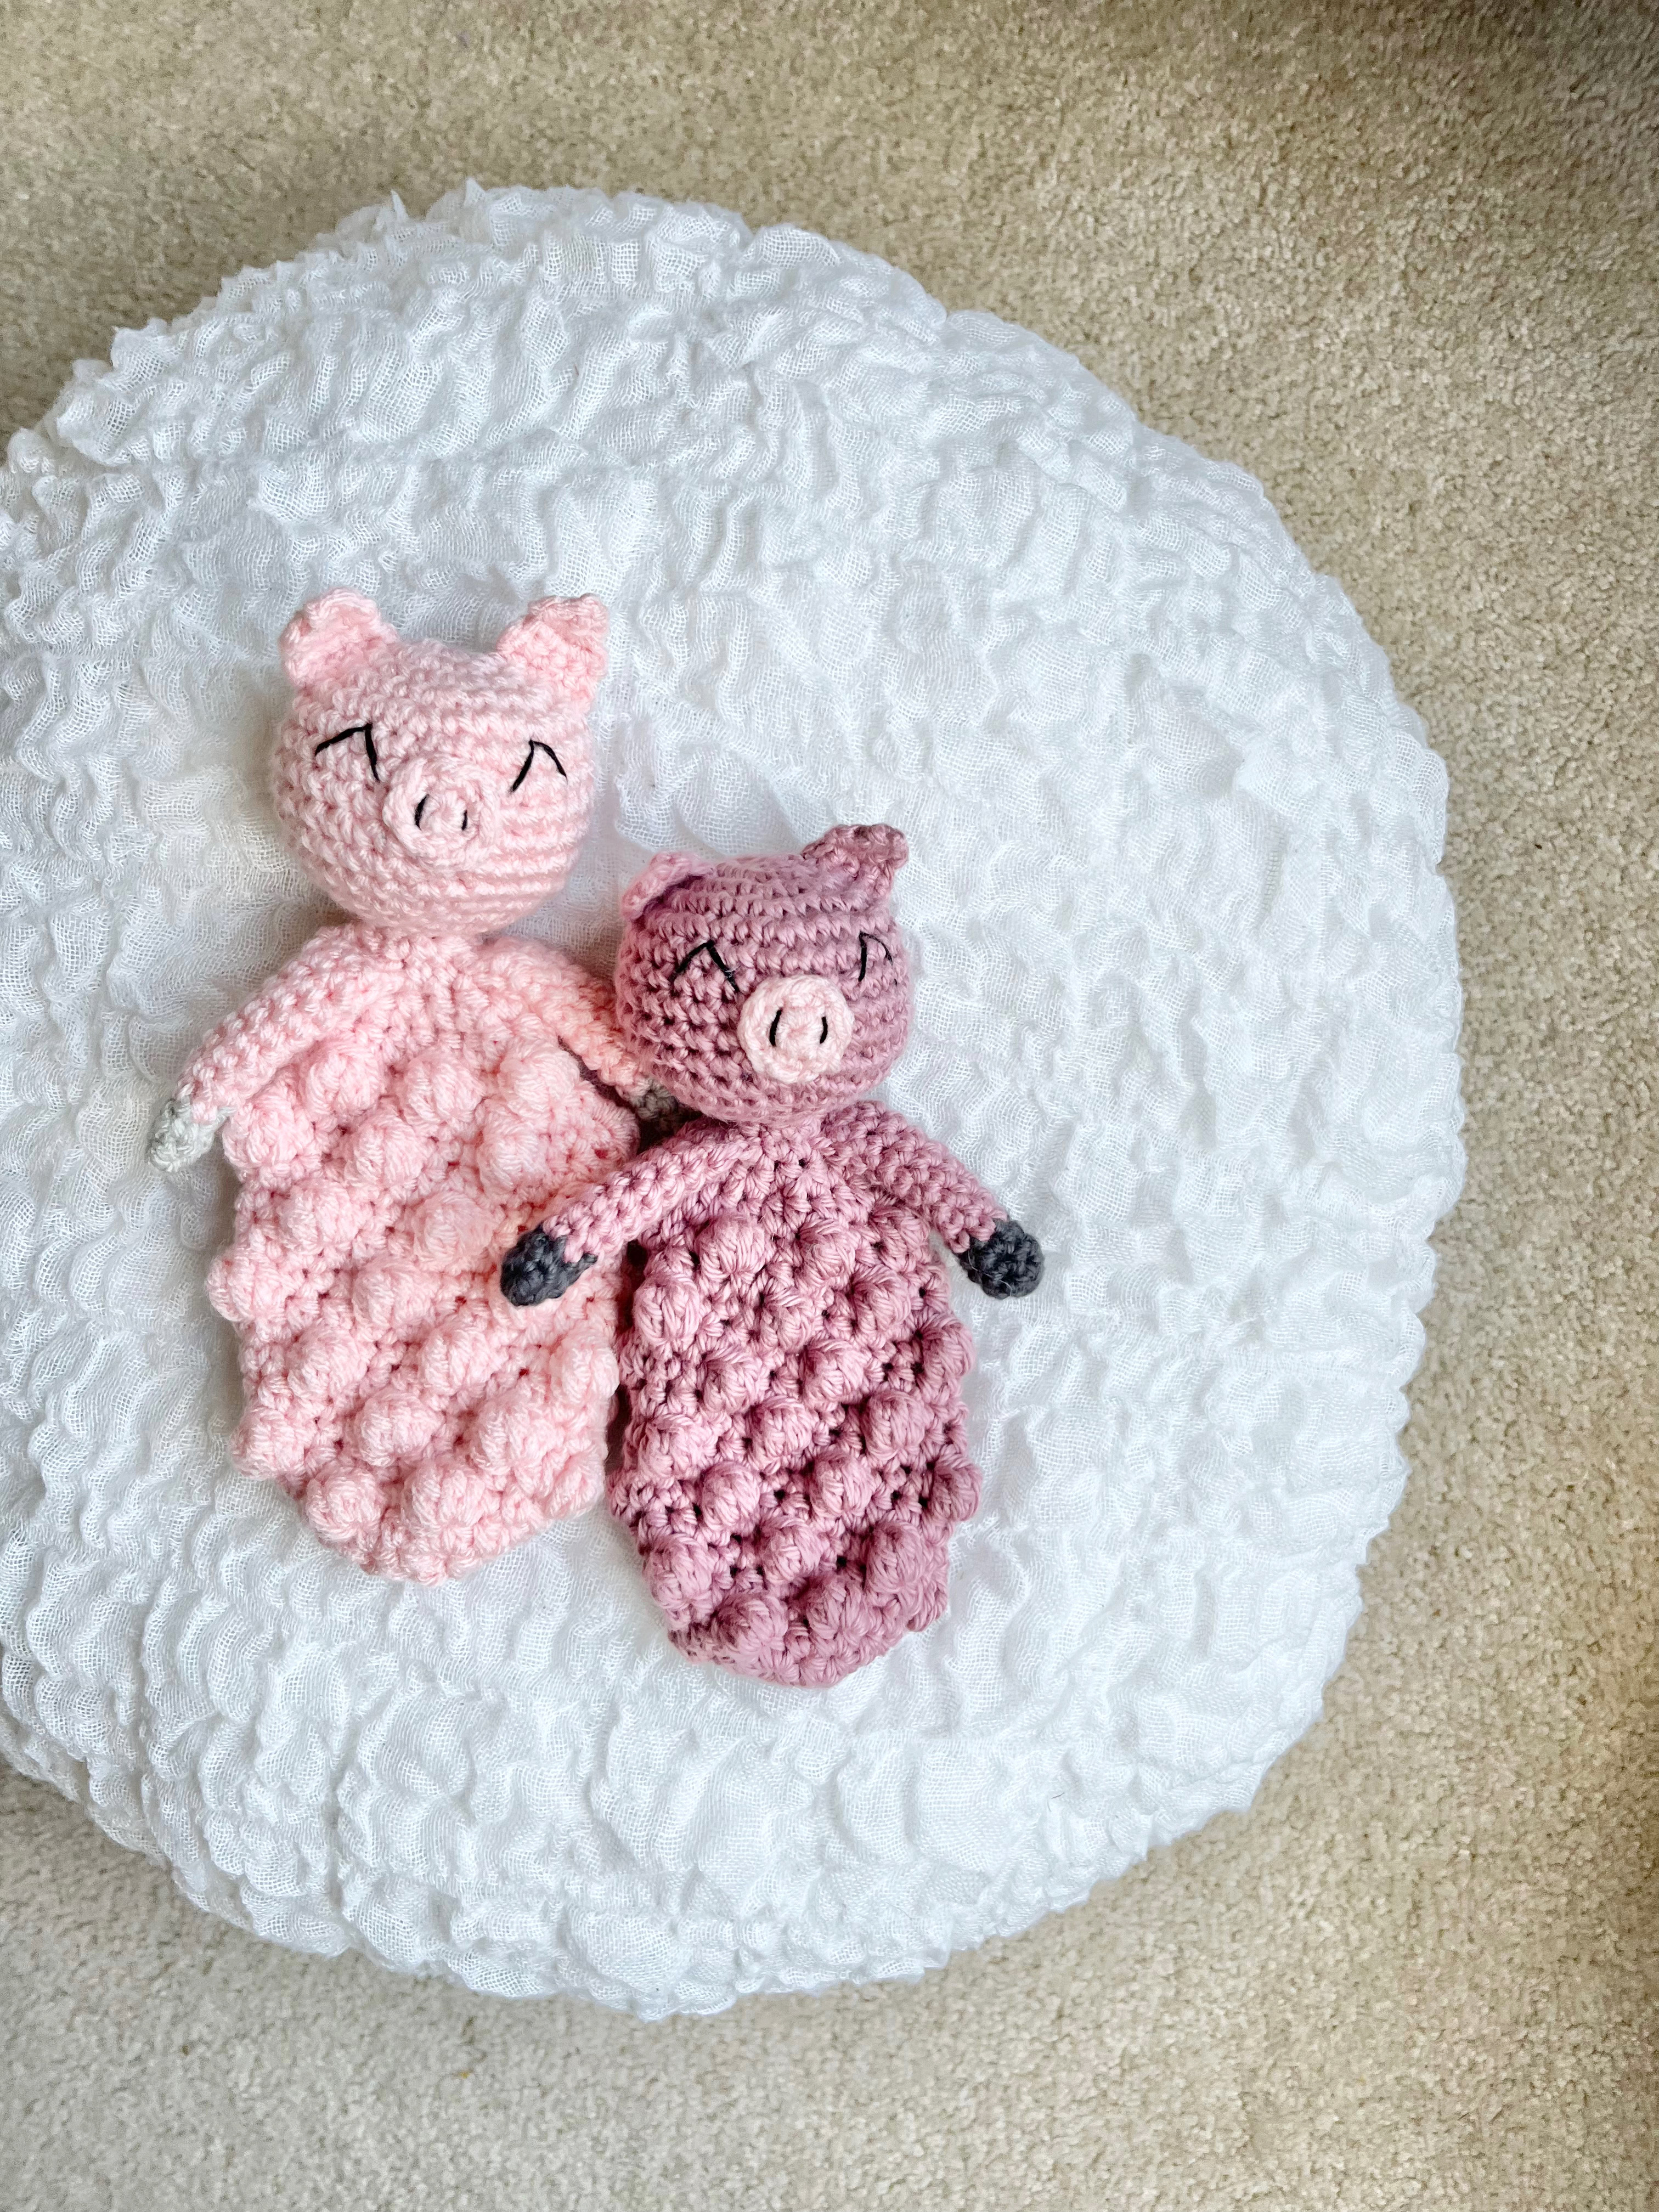
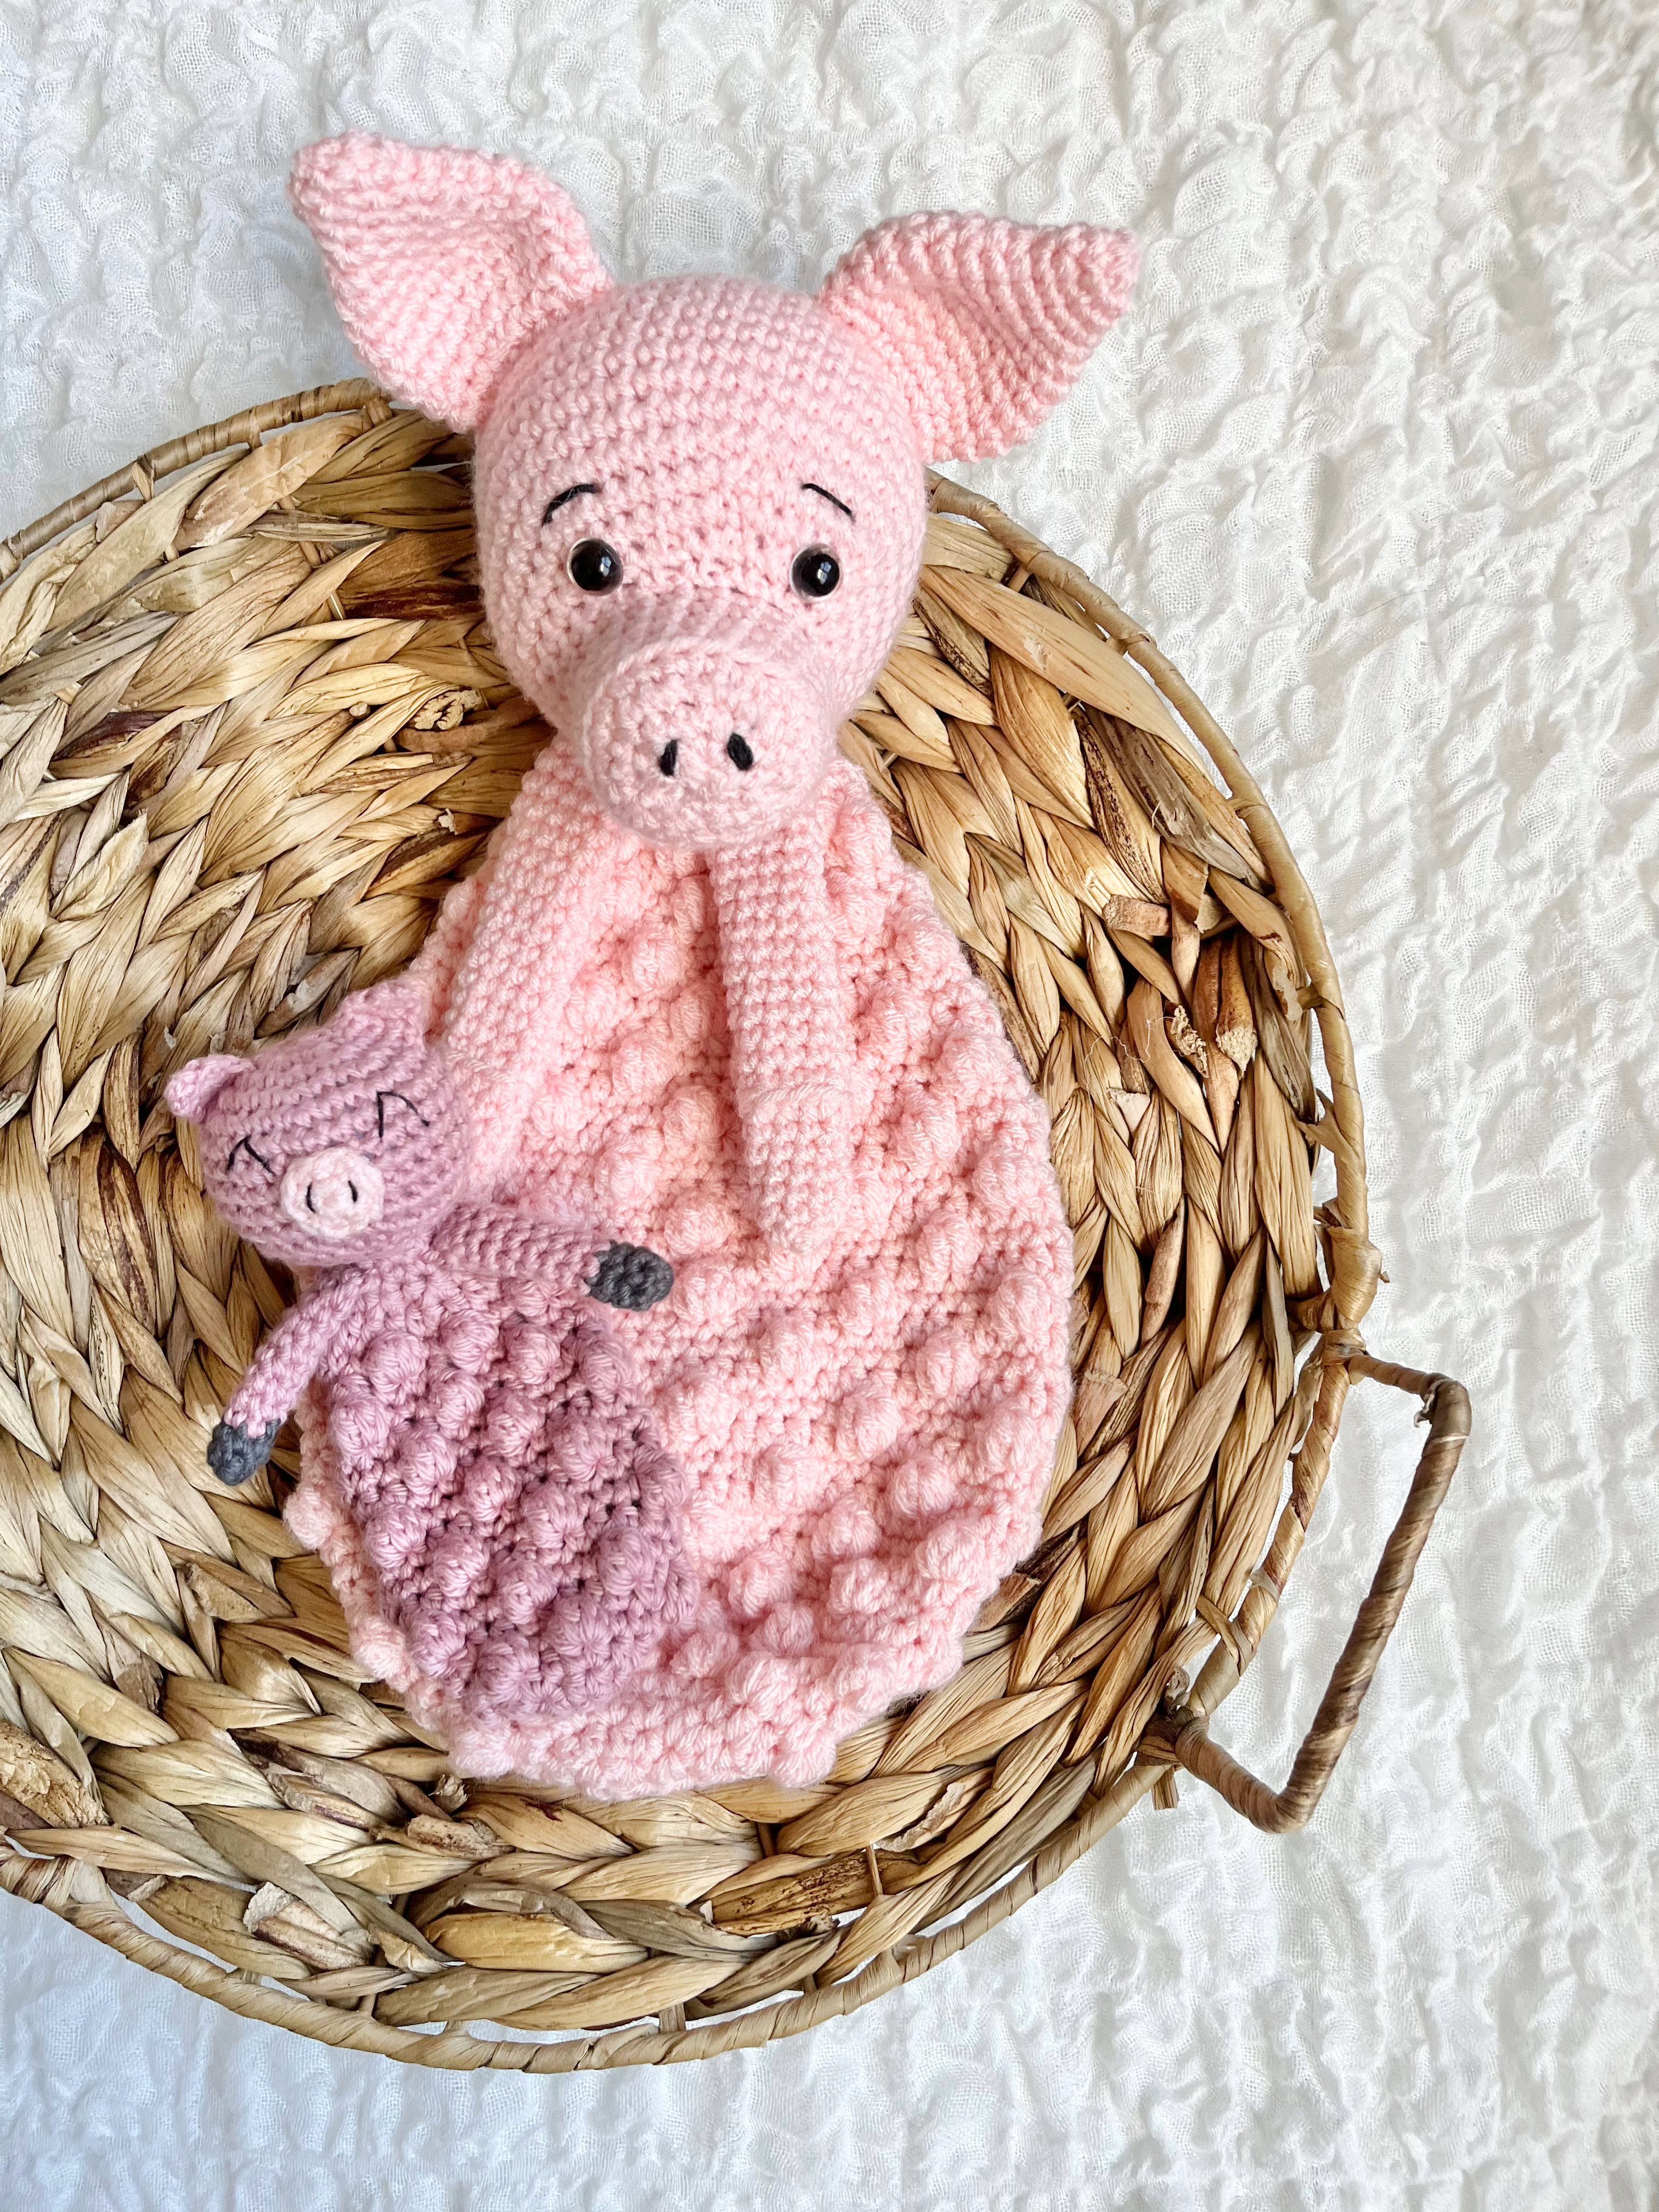
But…back to this adorable bitty pig!! I knew I needed at least one bitty buddy to go along with the farm collection and a bitty pig just seemed so cute! I am really wanting to make a trio of piggies so my kids can play “The Three Little Pigs!” Plus then each kid has their own pig, so hopefully leaving no need for bickering!
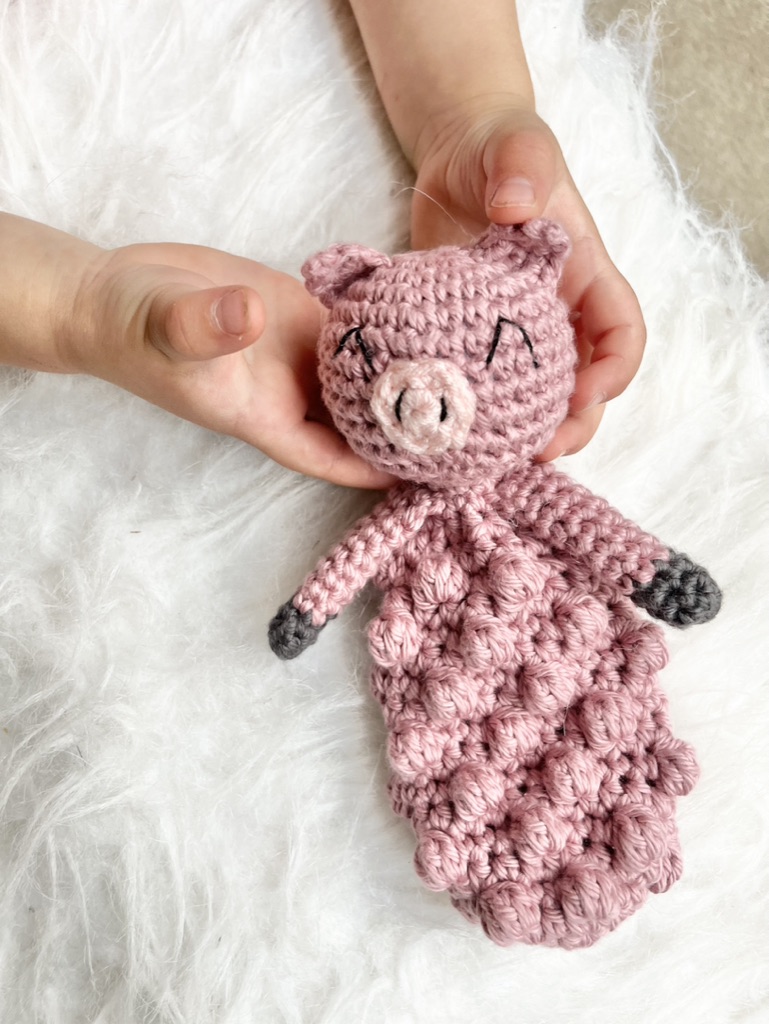
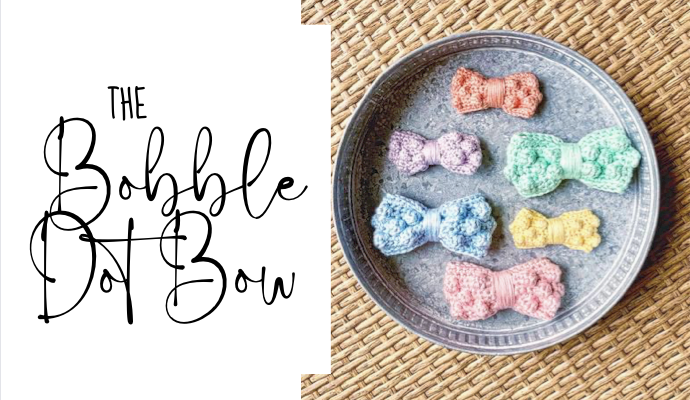
I’m offering this bitty pig pattern as a free modification of the original bitty buddies. In order to complete this free version of the pattern, you will need either the bunny or the bear bitty buddy patterns. Find them individually or bundled at a discount! You’ll make the head and body of the bitty buddy as written in either of those patterns and then follow the instructions below to make the ears, snout and arms for your bitty pig! This is an advanced beginner-friendly pattern. You should have an idea how to create basic stitches, crochet in the round and make the bobble stitch for this pattern. If you are unsure, check out my free Bobble Dot Bow or Ice Cream Cozy patterns!
Find the FREE pattern below or grab the pdf on Etsy or Ravelry. The pdf includes instructions for modifying your bitty buddy to a rattle, binky buddy or adding a teething ring! I’d love for you to share your projects with me on Instagram or Facebook – tag me with #stuckonyoucrochet for a chance to be featured!
MATERIALS NEEDED:
HOOK(S): 2.75 mm • US size C (ears and snout) / 3.75 mm • US size F (head) / 4.0 mm • US size G (arms and body)
YARN: Worsted Weight; I Love This Cotton Yarn; ~80 yds main; <1 yd accessory
NOTIONS: Darning Needle / Embroidery Thread / Measuring Tape / Polyfil Stuffing / Rattle Insert (if desired) / Scissors / Stitch Marker
FINAL SIZE: ~7.5 inches from top to bottom
STITCH ABBREVIATIONS:
SPECIAL STITCHES:
BOBBLE STITCH (bobble):
To make a bobble stitch you will work multiple double crochets into the same stitch.
To begin, yarn over and insert hook into the stitch. Yarn over and draw up a loop. This leaves three loops on your hook. Yarn over and pull through the first two loops (two loops left on hook).
Yarn over, insert hook into the stitch. Yarn over and draw up a loop, leaving four loops on your hook. Yarn over and pull through the first two loops (three loops left on hook).
Yarn over, insert hook into the stitch. Yarn over and draw up a loop, leaving five loops on your hook. Yarn over and pull through the first two loops (four loops left on hook).
Yarn over, insert hook into the stitch. Yarn over and draw up a loop, leaving six loops on your hook. Yarn over and pull through the first two loops (five loops left on hook).
Yarn over and pull through the five loops on the hook. Pull stitch tightly and it will create a bobble. You can choose to make the bobbles on the right or the wrong side of your project, just make sure they are on the outside of the body when finished
DECREASE STITCHES (dec): To decrease stitches, you will sc or hdc 2 stitches together.
INCREASE STITCHES (inc): To increase stitches, you will sc or hdc 2 stitches into the same spot.
PATTERN:
*Using a 4.0 hook for the body and a 3.75 mm hook for the head, you will make these portions of the pattern as written in the original bobble buddy patterns.*
MAKING THE EARS (Make Two) *Use a 2.75 mm hook to make the ears*
You will make the ears in the main yarn color (same as the head color).
Row 1: To begin, ch 2. Place 2 sc in the second ch from the hook. Ch 1 and turn. [2]
Row 2: sc, inc. Ch 1 and turn. [3]
Row 3: sc, inc, sc. Ch 1 and turn. [4]
Row 4: sc x 4 across.
Leaving a long tail to sew to head, cut yarn and tie off. [4] Weave in ends and set aside for assembly.
MAKING THE SNOUT *Use a 2.75 mm hook to make the ears*
You can choose to make the snout in the main color or in an accessory color.
Round 1: To begin, make a magic circle. Place 6 sc in the magic circle. Do not join. You will continue to work in the round. [6]
Round 2: [sc, inc] x 3 around. [9]
Leaving a long tail to sew to head, cut yarn and tie off. Weave in ends and set aside for assembly.
ADDING THE FACIAL FEATURES
After making the pieces above, make your bitty buddy head as written in the original pattern. Add features to the pig face as written below:
- Embroider the eyes across rounds 6-7 from the top of the head in an upside down V stitch. Leave ~5 stitches between the eyes.
- Use embroidery thread to sew two small black lines across the snout of the pig. Tie off and secure ends. Sew the snout onto the pig head, centered between the eyes. Snout should span rounds 7-10.
- Add ears by sewing across rounds 2-5 of the head. Eyes and snout should be centered between the ears.
Need more help with the features? Check out this video tutorial: https://youtu.be/ybGlK208NLM
MAKING THE ARMS (Make Two) *Use a 4.0 mm hook to make the arms*
If desired, you can use an accessory color to give your pig arms a “hoof.”
Round 1: Start with accessory color. To begin, make a magic circle. Place 6 sc in the magic circle. Do not join. You will continue to work in the round. [6]
Round 2: sc x 6 around. At end of row 3, switch to main color. [6]
Round 3: sc x 6 around. [6]
Pinch the top of the arm together and place 3 sc through each side in order to close off the arm. Cut yarn, tie off and weave in ends.
Make the body of your bitty buddy as written in the original pattern and add arms to the body as written. Sew the body to the head of your bitty buddy and enjoy!

I can’t wait to make this cutie little pig! I love all the bobble buddies patterns! They are so easy to make!