
I don’t know about you but the summer months always seem to bring my crocheting to a screeching halt. The carefree summer days, time at the pool, and toasty summer sun just make me want to laze away the days without a hot and sticky ball of yarn in my lap! Lo and behold, I always find myself itching for a quick little project in the evenings when my cro-jo finally flares back up for the day. If you need a quick project to inspire your cro-jo, I’ve got the perfect little pattern for you!
One of our favorite things to do in the warmer weather when we lived in Ohio was to visit the amazing Cincinnati Zoo. Walking around the beautiful grounds and checking out the diverse group of animals was such a fun way to spend the day! We don’t have a zoo close by anymore unfortunately, but we still love our zoo animals! Our love of the zoo was the inspiration for the latest bundle of bobble buddies – the zoo buddies! It was hard to narrow down what animals to start off with for a zoo pack but we settled on alligator, lion and elephant and have fallen totally in love with all three! If you’d like to make and fall in love with your own zoo buddies, you can find these patterns on Etsy and Ravelry.


I haven’t made many bitty buddy designs this year but knew I wanted at least one bitty to match with the bigger zoo buddies. So when Shannon from @shanlems sent me her modification for a bitty elephant, I was completely sold! This sweet little elephant brings so much love with his big ears and cute tiny trunk. And bitty buddies are the best little teether for tiny hands! I love making them in 100% cotton yarn to make them soft and sweet for gnawing little gums. You can add a teether ring or binky clip to give them even more versatility!

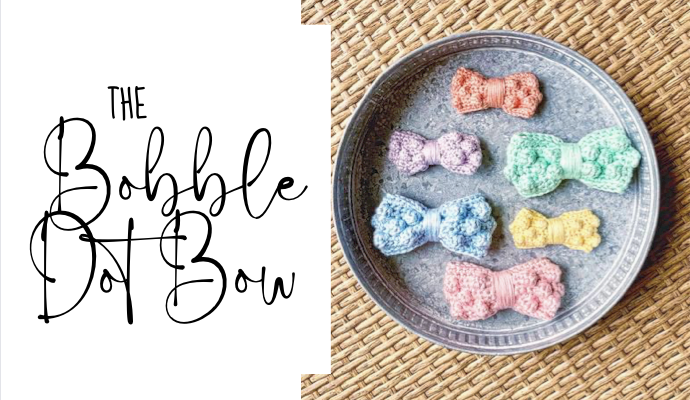
This FREE pattern is a modification on the original bitty buddies. In order to complete this free version of the pattern, you will need either the bunny or the bear bitty buddy patterns. Find them individually or bundled at a discount. You’ll make the head, arms and body of the bitty buddy as written in either of those patterns and then follow the instructions below for the elephant features to easily make a new bitty friend! This is an advanced beginner-friendly pattern. You should have an idea how to create basic stitches, crochet in the round and make the bobble stitch for this pattern. If you are unsure, check out my free Bobble Dot Bow or Ice Cream Cozy patterns!

MATERIALS NEEDED:
HOOK(S): 3.5 mm • US size E (head, ears and trunk) / 4.0 mm • US size G (arms and body)
YARN: Worsted Weight; I Love This Cotton Yarn; ~85 yds main; <1 yd accessory
NOTIONS: Darning Needle / Embroidery Thread / Measuring Tape / Polyfil Stuffing / Rattle Insert (if desired) / Scissors / Stitch Marker
FINAL SIZE: ~7.5 inches from top to bottom
STITCH ABBREVIATIONS:

SPECIAL STITCHES:
BOBBLE STITCH (bobble):
To make a bobble stitch you will work multiple double crochets into the same stitch.
To begin, yarn over and insert hook into the stitch. Yarn over and draw up a loop. This leaves three loops on your hook. Yarn over and pull through the first two loops (two loops left on hook).
Yarn over, insert hook into the stitch. Yarn over and draw up a loop, leaving four loops on your hook. Yarn over and pull through the first two loops (three loops left on hook).
Yarn over, insert hook into the stitch. Yarn over and draw up a loop, leaving five loops on your hook. Yarn over and pull through the first two loops (four loops left on hook).
Yarn over, insert hook into the stitch. Yarn over and draw up a loop, leaving six loops on your hook. Yarn over and pull through the first two loops (five loops left on hook).
Yarn over and pull through the five loops on the hook. Pull stitch tightly and it will create a bobble. You can choose to make the bobbles on the right or the wrong side of your project, just make sure they are on the outside of the body when finished
DECREASE STITCHES (dec): To decrease stitches, you will sc or hdc 2 stitches together.
INCREASE STITCHES (inc): To increase stitches, you will sc or hdc 2 stitches into the same spot.
PATTERN:
*Using a 4.0 hook for the body and a 3.5 or 3.75 mm hook for the head, you will make these portions of the pattern as written in the original bobble buddy patterns.*
MAKING THE EARS (Make Two) *Use a 3.5 mm hook to make the ears*
You will make an inner ear and an outer ear and then join these two pieces together to create the ear. You will make two inner years in an accessory color and two outer ears in the main yarn color (same as the head color). You will NOT join at the end of each round; continue working in the round.
Round 1: To begin, make a magic circle. Place 6 sc in the magic ring. Do NOT join. [6]
Round 2: [inc] x 6 around. [12]
Round 3: [inc, sc] x 6 around. [18]
Round 4: [inc, sc x 2] x 6 around. [24]
Round 5: [inc, sc x 3] x 6 around. [30]
For the INNER ear, slip stitch, cut yarn and tie off. Set to the side until joining.
For the OUTER ear, do NOT cut yarn. After finishing round 5 on the outer ear, slip stitch, ch 1 and turn. Place the inner ear on top of the outer ear. Working through both the inner and outer ear at the same time, sc x 30 around the outer edge of the ear. After completing 30 stitches, slip stitch to the next stitch and fold the ear in half. With the ear folded in half, slip stitch through 3-4 stitches to help the ear maintain a folded shape. Tie off and cut yarn, leaving a long tail to sew the ear to the head of the elephant. Repeat these steps for the second ear.
Weave in ends and set aside for assembly.
MAKING THE TRUNK *Use a 3.5 mm hook to make the trunk*
Make the trunk in the main color (same as the head color). You will NOT join at the end of each round; continue working in the round.
Round 1: To begin, make a magic circle. Place 6 sc in the magic circle. Do NOT join. You will continue to work in the round. [6]
Round 2: inc, sc x 5. [7]
Rounds 3-4: sc x 7 around. [7]
Round 5: inc, sc x 6. [8]
Round 6: sc x 8 around. [8]
Round 7: [inc] x 2, sc x 6. [10]
Round 8: sc x 10 around. [10]
Round 9: sc x 2, inc, sc x 7 [11]
Leaving a long tail to sew to head, cut yarn and tie off. Weave in ends and set aside for assembly.
ADDING THE FACIAL FEATURES
After making the pieces above, make your bitty buddy head as written in the original pattern. Add features to the elephant face as written below:

- Sew the trunk onto the head first. I highly recommend using pins for placement of the trunk prior to sewing. Trunk should be centered and sewn across rounds 8-12. You can choose to stuff the trunk or leave it unstuffed. If you stuff the trunk, do not overstuff or it will stick straight off the head. If left unstuffed, bend slightly to curve the trunk upwards or downwards.
- Embroider the eyes in an upside down v-shape across rounds 7-8 from the top of the head. Leave ~4 stitches between the eyes (inner eye to inner eye).
- To add the ears, pin them evenly spaced across the top of the head around rounds 4-5. Sew across the top of the ear as well as down the front inner ear to secure the ear to the head. You may also wish to tack a few stitches to the inner back of the ear to secure it to the head and prevent it from flopping forward. See photos below for help with placement.


Make the body of your bitty buddy as written in the original pattern and add arms to the body as written. Sew the body to the head of your bitty buddy and enjoy!