How to Crochet the Puff Stitch
One of my favorite ways to play with crochet is by using new stitches to add interesting texture to a design. The puff stitch is a simple way to add some intricacy to your project! The puff stitch creates raised bumps called “puffs” across the work.
This stitch is used in Block Three of The Stitchwork Scarf. Learn each of the stitches included in this whimsical scarf design by checking out the stitch-a-long HERE!
Don’t miss a free pattern! Subscribe to the
newsletter to keep up with all the latest!

There are different ways to create a puff stitch and the number of “yarn overs” can be used to create larger or smaller puffs. The more times you yarn over, the larger and thicker your puff will be. The fewer times you yarn over, the smaller and thinner your puff will be. With worsted weight yarn (or thinner), you may find that you need to yarn over more times to create the texture you like. With bulky or super bulky yarn, you may find that you need to yarn over fewer times or your puff is way too thick!
Most puffs use a yarn over count of either 3 or 4 times to end with 7 or 9 loops on the hook before pulling through. Now…I know I haven’t even shared the instructions yet so don’t let this confuse you! This is simply describing the number of times you will repeat the steps for your puff.
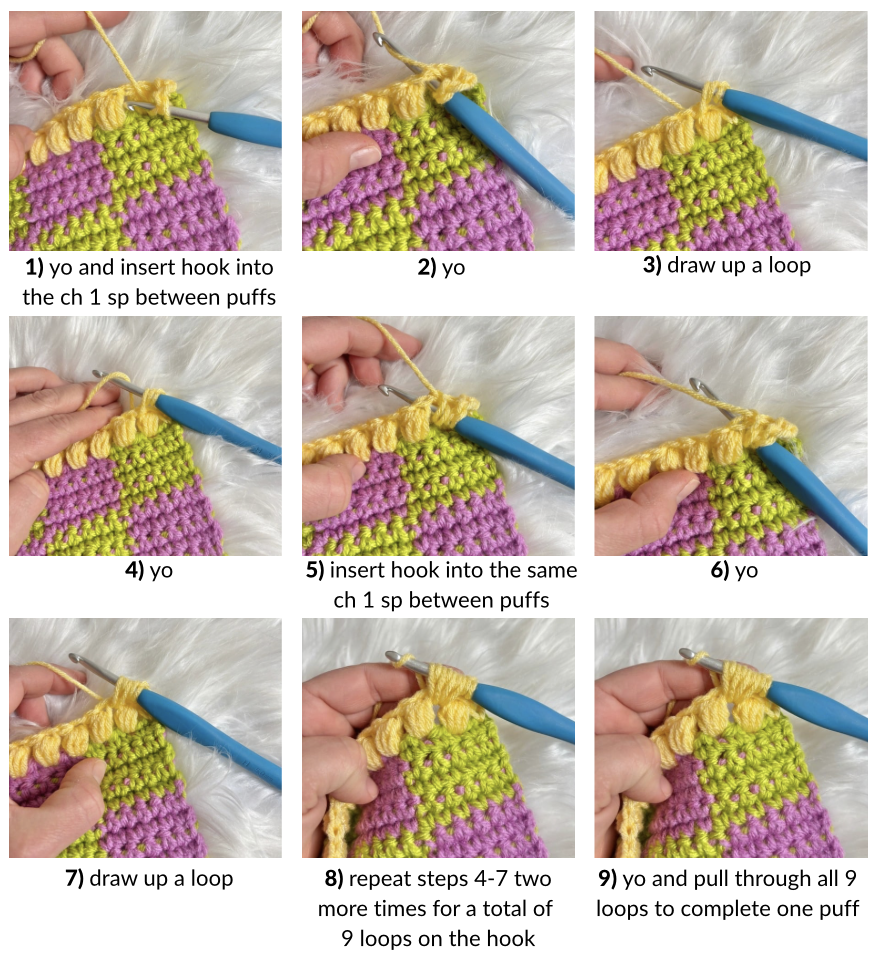
In this tutorial, we will yarn over a total of 4 times to end with 9 loops on the hook to pull through. However, if you are using bulkier or double stranded yarn and find this too thick, you may yarn over a total of 3 times to end with 7 loops on the hook to decrease the bulk of the stitch.
Puff Stitch (puff): [yarn over (yo) and insert hook into the stitch or space. yo and pull up a loop.] Repeat from [ ] three more times to end with 9 loops on the hook. yo and pull through all 9 loops.
Need more help? Check out the video tutorial HERE!